Parrot OS on Raspberry Pi: Editions, Setup and Built-In Security Tools
Parrot OS brings privacy, forensics and network analysis tools to Raspberry Pi, with Core, Home and Security editions for different workloads.
Parrot OS gives Raspberry Pi users a Debian-based environment that combines privacy features with tools for network analysis, penetration testing and digital forensics. Its main distinction from Kali Linux is that privacy and forensic utilities sit alongside testing tools, though that broader software set can demand more from the hardware.

For a Pi build, the choice of edition matters as much as the choice of board. Core provides a base system, Home keeps the installation lighter and includes privacy tools, and Security bundles the full set of security and testing utilities. The steps below cover selecting an image, writing it to a microSD card, completing first-boot configuration and accessing the desktop remotely.
What Parrot OS offers
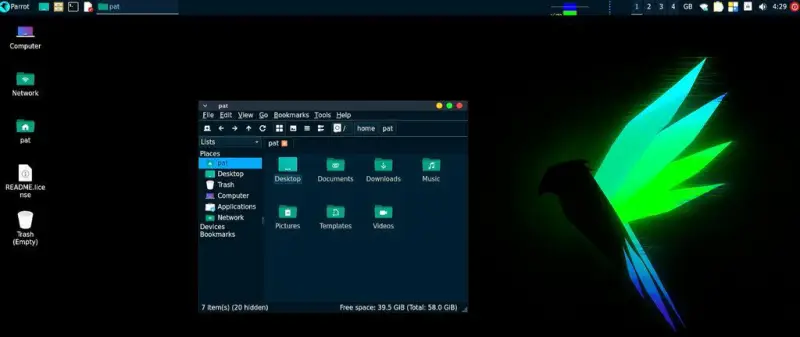
Parrot OS is an open-source Linux distribution based on Debian and aimed at people working in IT security and digital forensics. Its toolset includes privacy and anonymity software such as AnonSurf, plus network utilities including NMap, Wireshark and AirCrack-NG. The exact tools available depend on the edition, and some may need to be installed separately.
Choosing an edition
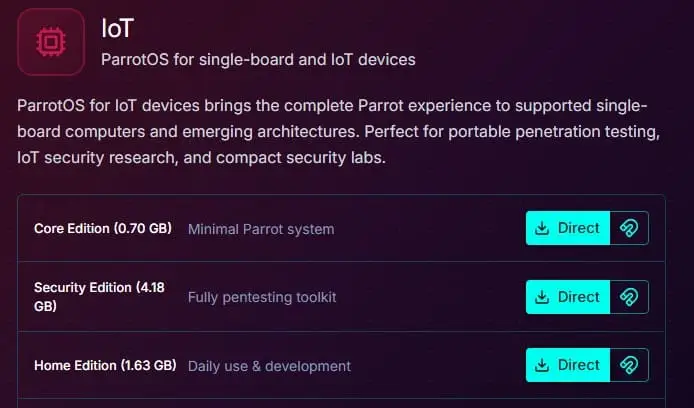
- Core Edition contains base packages. Users can add the packages they need separately or during setup.
- Home Edition is a lighter choice for everyday use, with privacy and anonymity tools but without the security and penetration-testing package set.
- Security Edition includes the full collection of security, testing, privacy and anonymity tools.
That makes the decision fairly practical: Core suits a deliberately minimal installation, Home is intended for general desktop use, and Security provides the widest tool selection. The latter is the edition used in the setup described here.
Parrot OS and Kali Linux
Both distributions provide tools for penetration testing, but they have different emphases. Kali is more narrowly oriented toward penetration testing and is widely used in formal training and certification contexts. Parrot combines comparable testing tools with a larger focus on privacy, communications, encryption and forensics.
Parrot includes privacy options such as Tor, I2P and AnonSurf, while Kali supports privacy tools but does not include them by default, according to the comparison presented here. Parrot also includes tools for digital forensics and secure data management. Its broader collection can make it more resource-intensive than a smaller Kali installation.
The comparison also characterizes Kali as a lightweight, specialized system with an XFCE desktop and a smaller default installation. Parrot is described as somewhat more approachable for beginners because of its broader toolset and traditional desktop, although users seeking a system devoted primarily to penetration testing may prefer Kali. On a Raspberry Pi, available memory and the intended workload should guide the choice.
Prepare the Raspberry Pi and image
The setup supports Raspberry Pi 3B, 4B, 400 and 5 models. The guide recommends a Raspberry Pi 5 for a smoother experience, but gives no benchmark results or minimum memory requirement. It also calls for a microSD card of at least 16GB, a card reader if the computer lacks an SD slot, Raspberry Pi Imager, and a display, keyboard and mouse for initial setup.
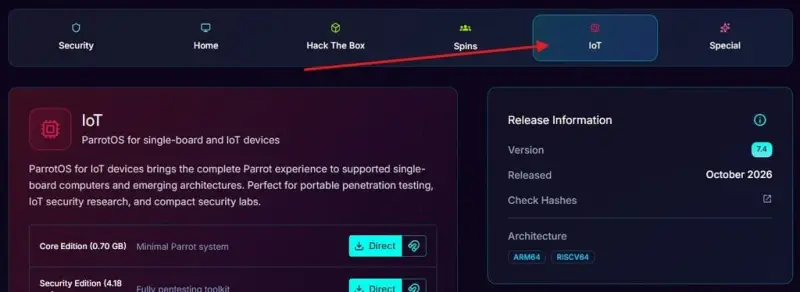
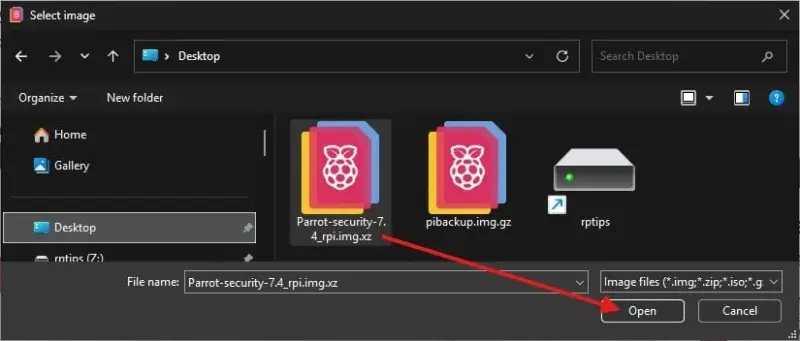
Parrot OS does not appear as a standard operating system selection in Raspberry Pi Imager. Instead, download the Raspberry Pi image from the Parrot OS download page. Choose the IoT category, select the desired edition, then use the direct download option. Security Edition is the choice if the aim is to try the full toolset.
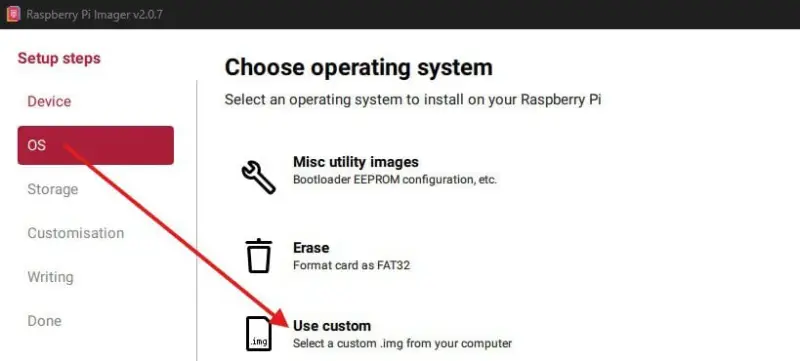
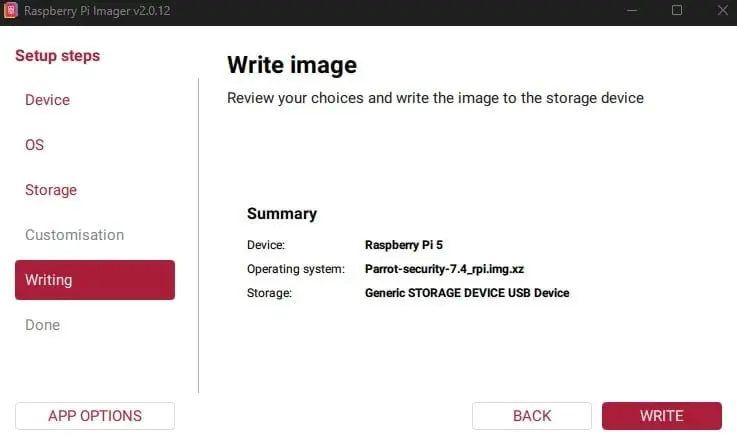
Once the image file is ready, open Raspberry Pi Imager and select the Pi model under Device. Under OS, scroll to Use custom and choose the downloaded image. Insert the microSD card through the reader and select it as the storage target.
Check the storage selection carefully: writing the image erases the selected card. Click WRITE and let the process finish. Remove the card from the computer and insert it into the Raspberry Pi.
First boot and basic configuration
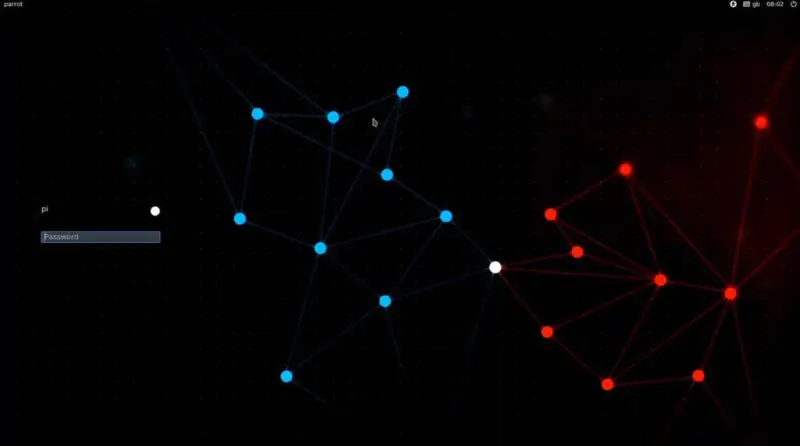
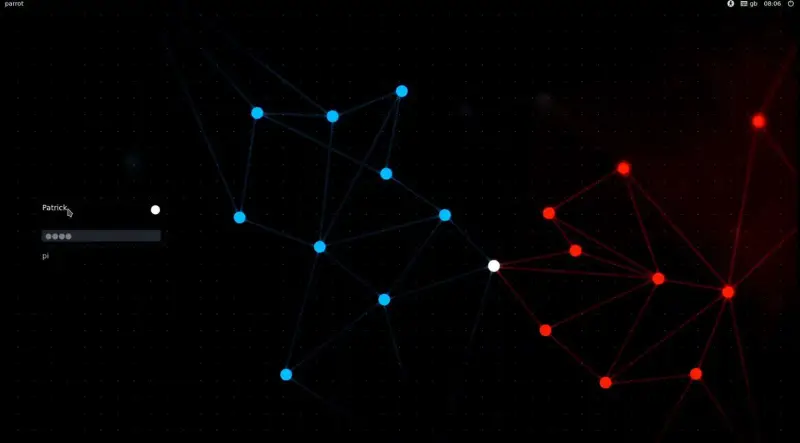
Connect a display, keyboard and mouse, then power up the Pi and wait for the login screen. The documented default credentials are username pi and password parrot. After signing in, the desktop is ready for initial configuration.
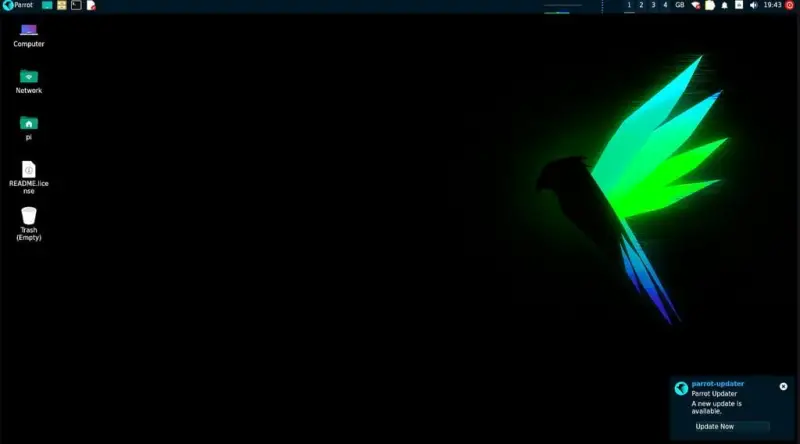
Change the default password and create a personal account before using the system for ongoing work. The initial keyboard layout is set to UK, so users with a different keyboard should add the matching layout through Parrot menu > Preferences > LXQt Settings > Keyboard and Mouse. On the Keyboard Layout tab, choose Add, select the layout and variant, then save.
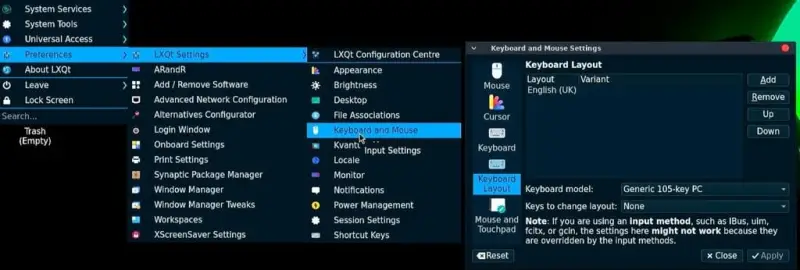
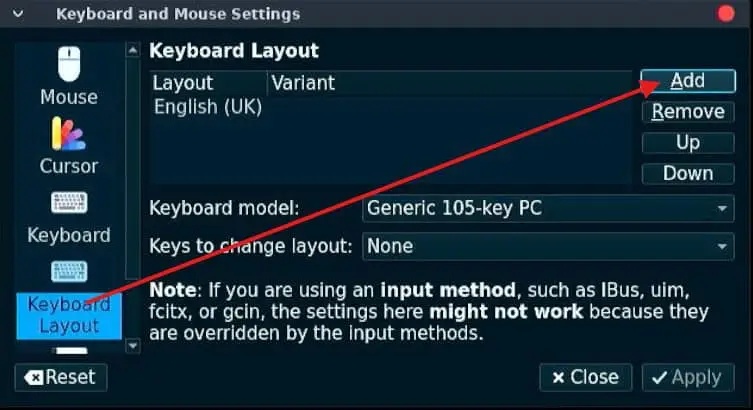
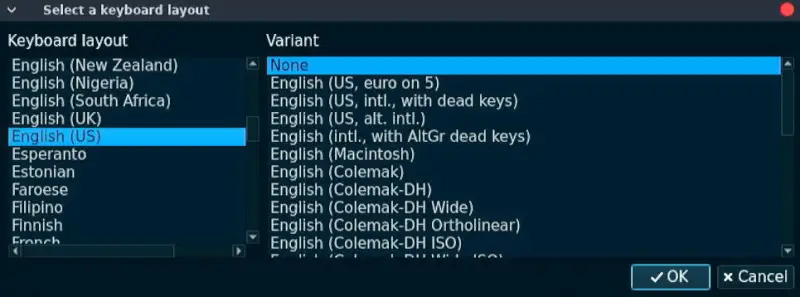
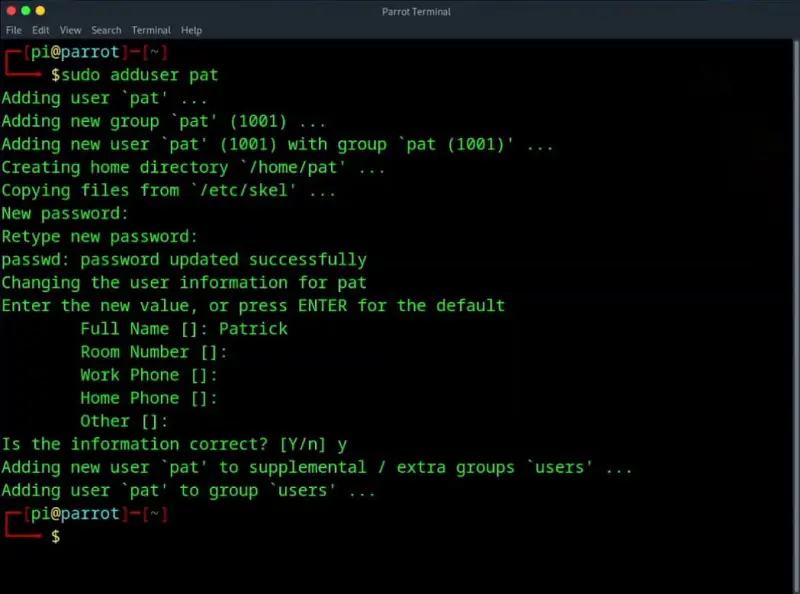
To create a named user, open a terminal and run:
sudo adduser <username>
The system will prompt for a password and may ask for optional account details. To allow the account to run administrative commands with sudo, add it to the sudo group:
sudo usermod -aG sudo <username>
Sign out and select the new account at the login screen. Removing or changing the password of the default account is also suggested. The practical point is to avoid continuing with the shared default credentials once the system is in regular use.

Network access and updates
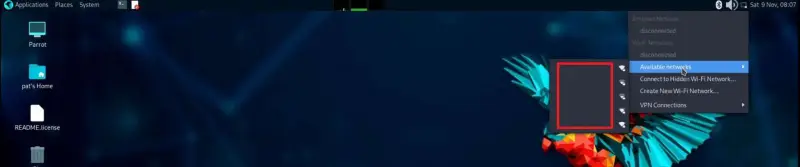
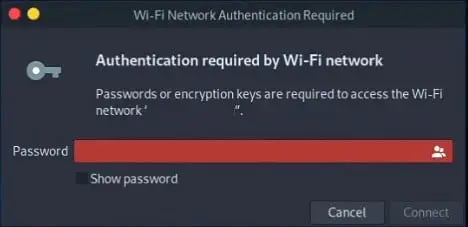
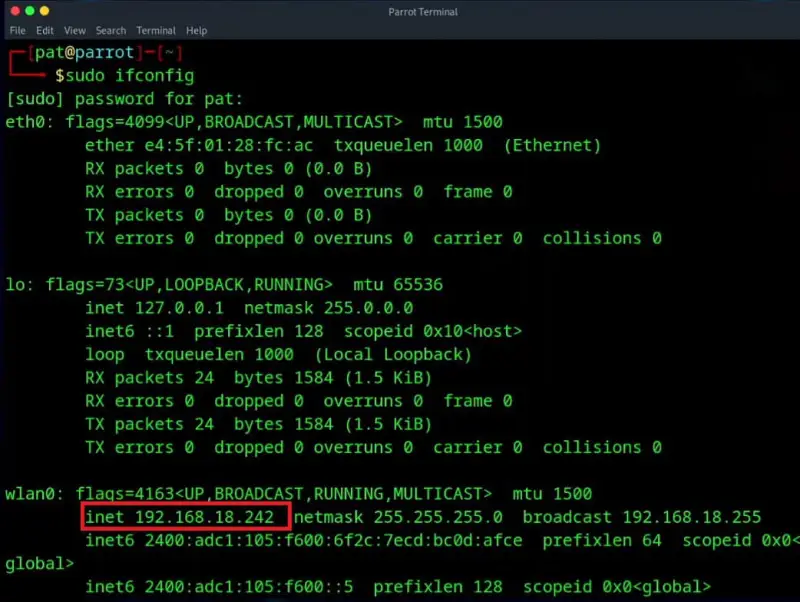
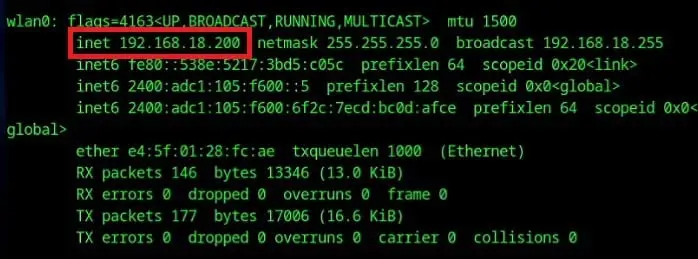
For a basic connection, use the desktop network menu to select a Wi-Fi network and enter its password. The default approach relies on the router’s DHCP service, which assigns the Pi an address automatically. To inspect network details from a terminal, the guide uses:
sudo ifconfig
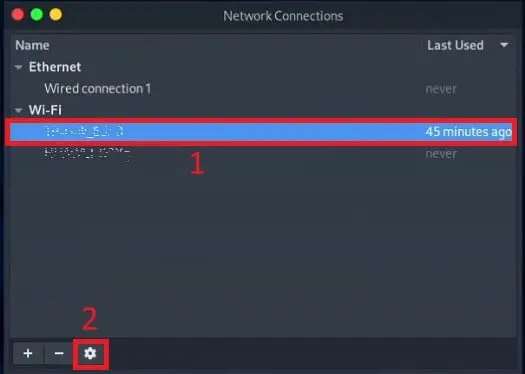
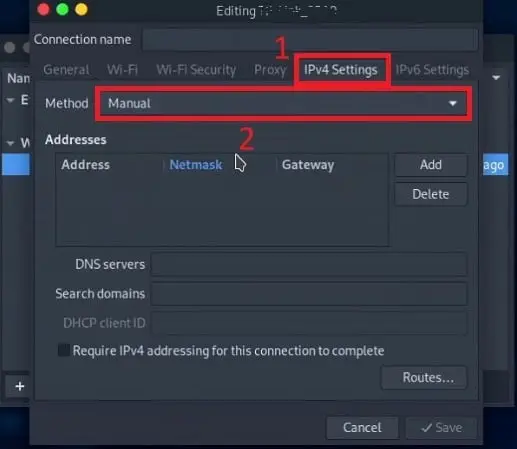
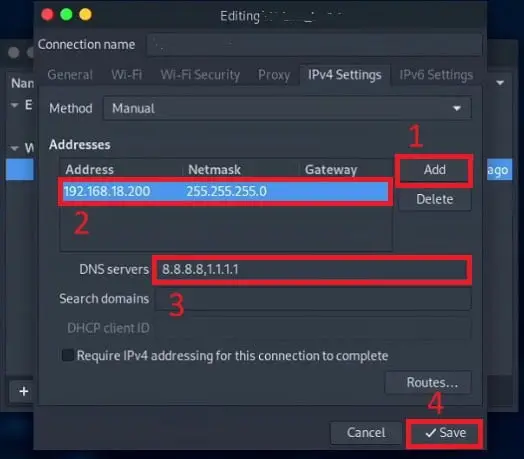
A fixed IPv4 address can be configured through Parrot menu > Preferences > Advanced Network Configuration. Select the connection, open its settings with the gear icon, and choose IPv4 Settings. Change the method from Automatic (DHCP) to Manual, add the required IP configuration and save.
Restart NetworkManager to apply the change, then check the network details again:
sudo systemctl restart NetworkManagersudo ifconfig
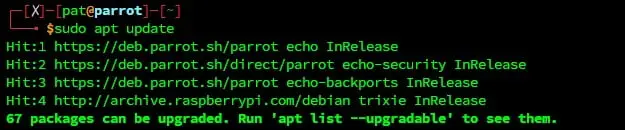
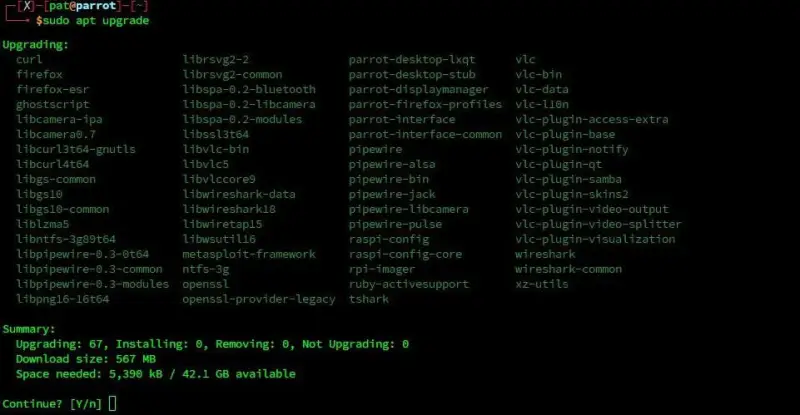
Once network access is available, refresh the package information and install available upgrades:
sudo apt updatesudo apt upgrade
Updating before adding or using packages gives the installed system current package metadata and upgrades available through its configured repositories.
Remote access with SSH and VNC
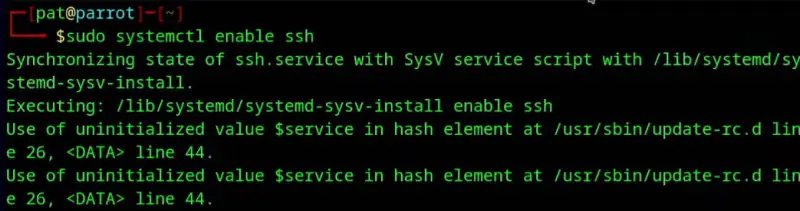
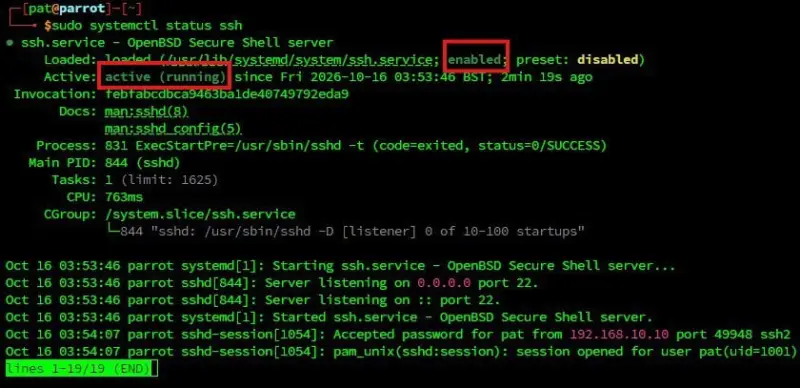
After the first setup, the Pi can be used without a directly attached display, keyboard or mouse. For terminal access, enable SSH so it starts at boot, then start the service immediately:
sudo systemctl enable sshsudo systemctl start ssh
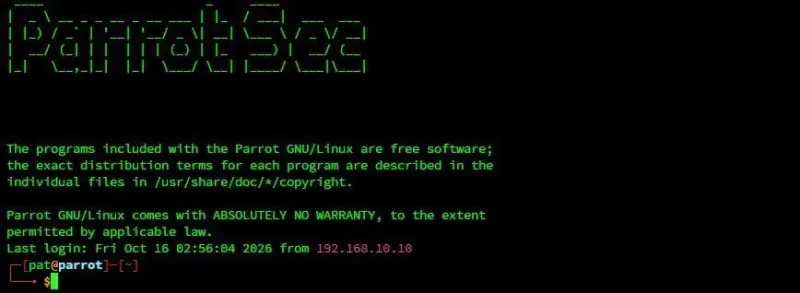
Check the service with sudo systemctl status ssh. From another computer, connect using the new account name and the Pi’s IP address:
ssh <username>@<hostname_IP>
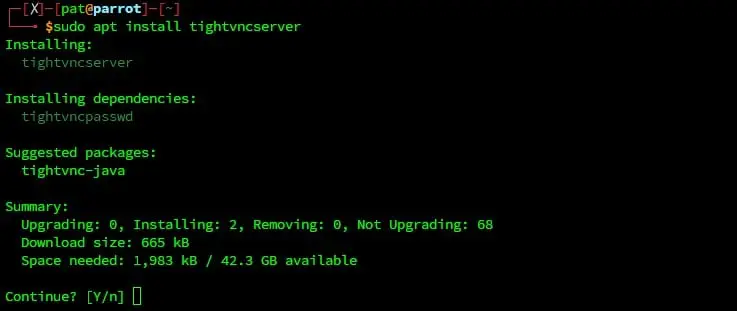
For graphical access, install TightVNC Server and start it:
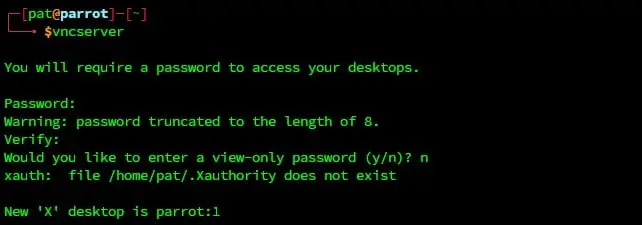
sudo apt install tightvncservervncserver
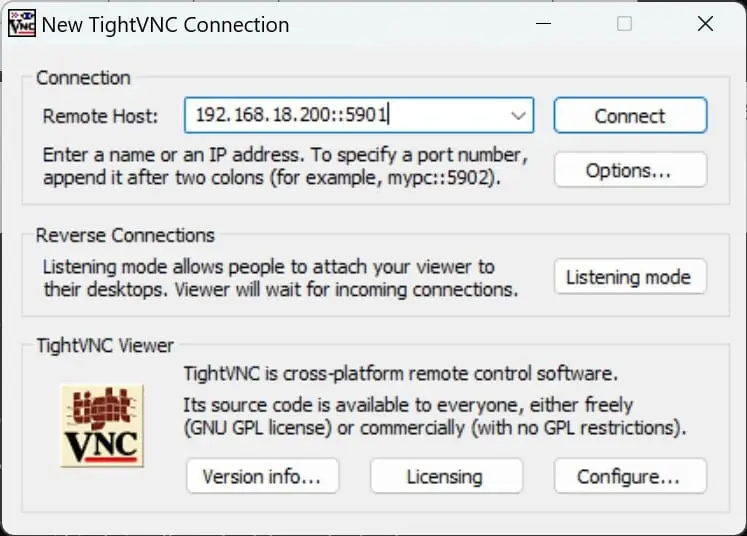
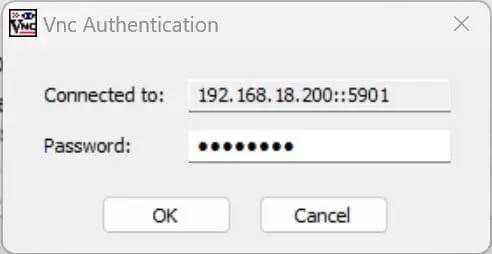
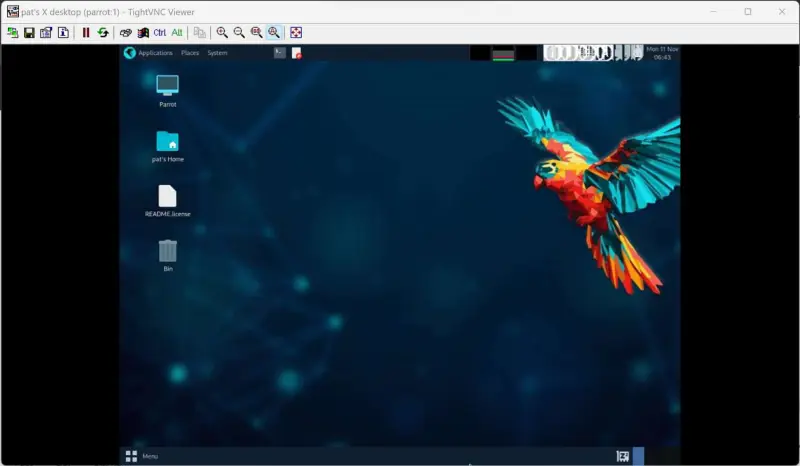
The first run prompts for a VNC access password. Install the TightVNC Client on the remote computer, then enter the Pi’s IP address and display port. The port number is given as 5900 + Desktop Number; for desktop 1, that is 5901. Enter the password set when starting the server to view and control the Pi’s desktop.
Tools to explore
AnonSurf and system-wide Tor routing
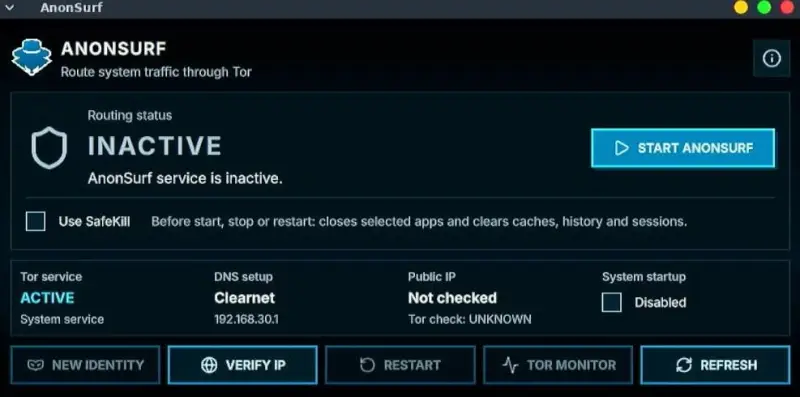
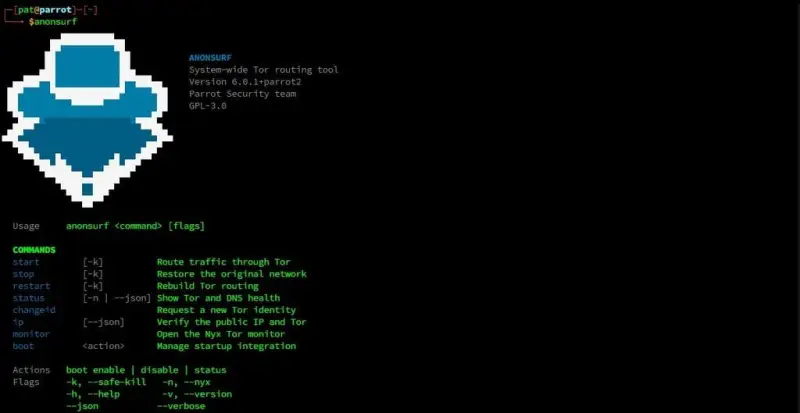
AnonSurf routes network traffic through Tor at the system level, rather than limiting Tor use to a single browser. It can be controlled through a graphical interface or from a terminal. In the tested Security image described here, AnonSurf was absent by default, so it had to be installed separately:
sudo apt install anonsurf anonsurf-gtk anonsurf-cli
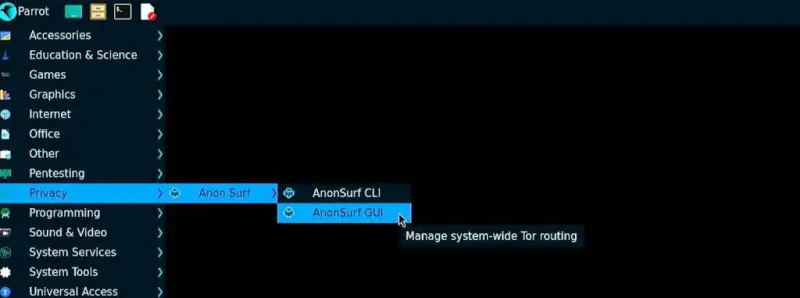
After installation, its graphical control is under Privacy > Anon Surf > AnonSurf GUI, where the START control toggles the service. The command-line interface can be opened with anonsurf. This makes AnonSurf a notable example of Parrot’s privacy focus, but the specific image should be checked rather than assuming the package is already present.
NMap for network inventory
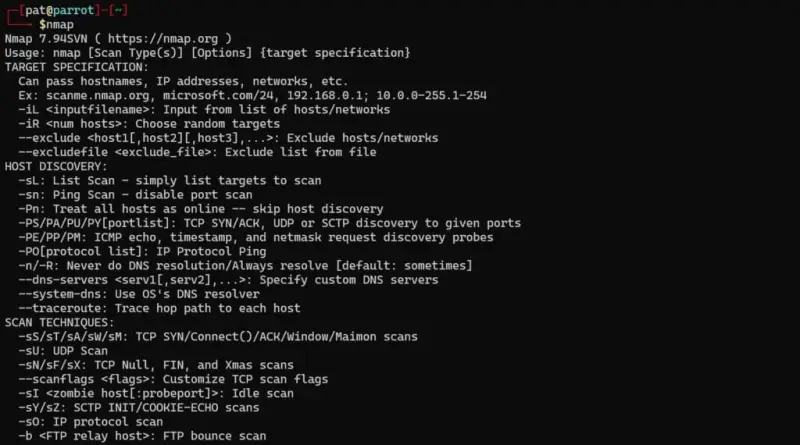
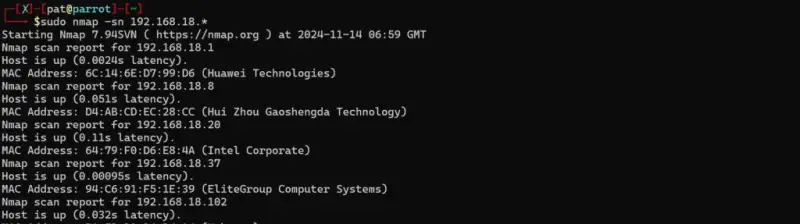
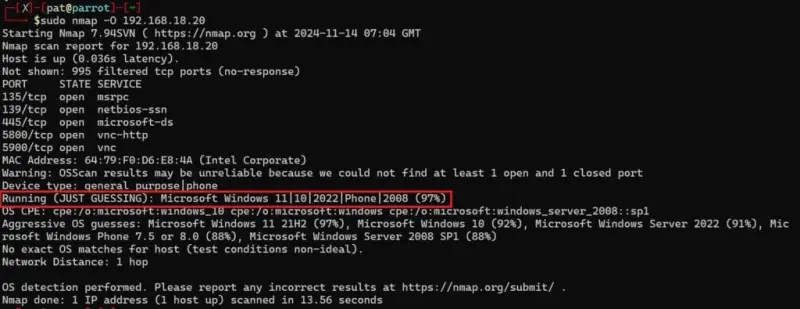
NMap can identify active addresses, open ports and software running on reachable systems. Running nmap without options displays its available command-line choices. The examples below show a ping scan over an IP range, a port scan against one address and an operating-system detection attempt:
sudo nmap -sn <IP Range>sudo nmap -n -NP -sT -sU <IP Address>sudo nmap -O <IP Address>
These functions make NMap useful for mapping devices on a network and investigating services on systems within the operator’s authorized scope. Detection results are an analysis aid, not a guarantee that every device or operating system will be identified correctly.

Wireshark for packet inspection
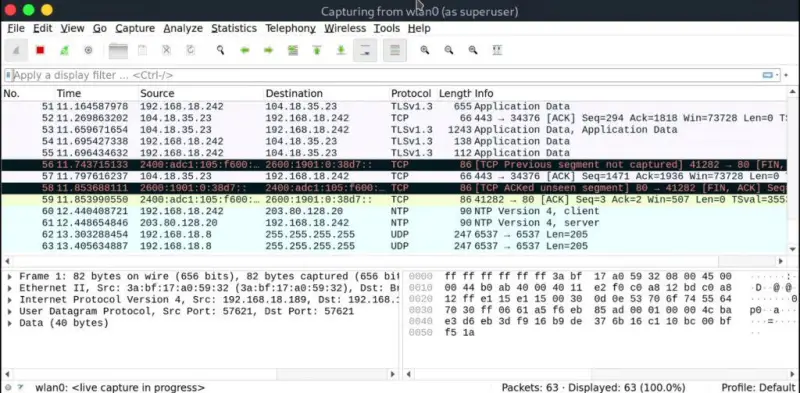
Wireshark is included in the described installation and can be opened from Pentesting > Most Used Tools > Wireshark. Starting a capture through Capture > Start displays network packets visible to the system, which can help diagnose traffic and network configuration.
By default, the capture view shows traffic directed to the Pi. Capturing wireless traffic not addressed to it depends on the Wi-Fi adapter supporting monitor mode. That hardware capability is a constraint to check before treating the Pi as a wireless capture platform.
Aircrack-ng and Wi-Fi adapter support
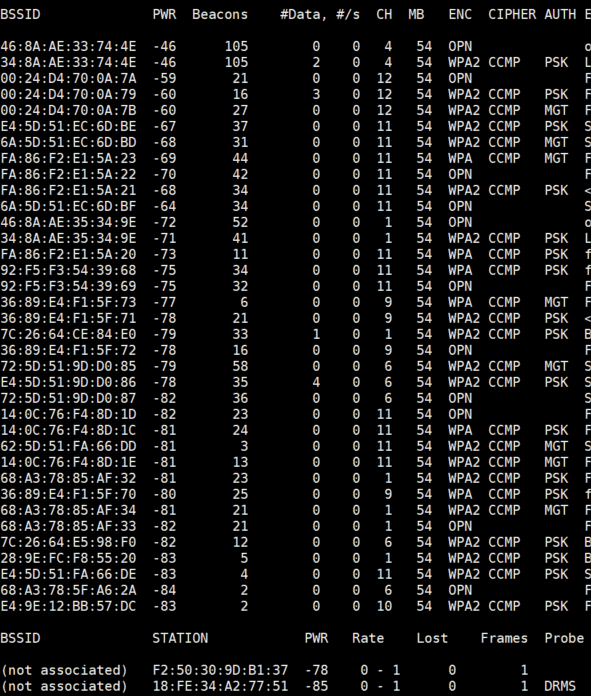
AirMon-NG and AirCrack-NG are included tools for wireless security testing, but their use depends on the Wi-Fi hardware. The adapter must support monitor mode. During the reported test, the Raspberry Pi 400 did not expose that mode, so a compatible USB Wi-Fi adapter may be needed.
To list wireless devices, the guide uses sudo airmon-ng. It then starts monitor mode on wlan0 with sudo airmon-ng start wlan0, and uses sudo airodump-ng wlan0mon to display nearby wireless networks. The interface name can vary with hardware and system configuration, so the device listing is relevant before attempting a capture.

Parrot OS on a Raspberry Pi is best understood as a configurable tool platform. Its editions let users choose the software footprint, while the board, microSD card and wireless adapter shape what workloads are practical. After the image is written, replacing default credentials, applying updates and confirming remote access leave the system ready for privacy, network analysis and forensic work within the limits of its hardware.
 AMD Venice Uses 2.5D Packaging to Feed More Bandwidth Into EPYC Zen 6
 CNC Controller Board Design: Interfaces, PCB Specs and Assembly Testing
 Stratasys and Nano Dimension End $42.5 Million Markforged Sale Agreement