Build a Raspberry Pi Magic Mirror: Installation, Configuration and Modules
Install MagicMirror on Raspberry Pi, configure its display and widgets, enable remote access and automatic startup, and add community modules.
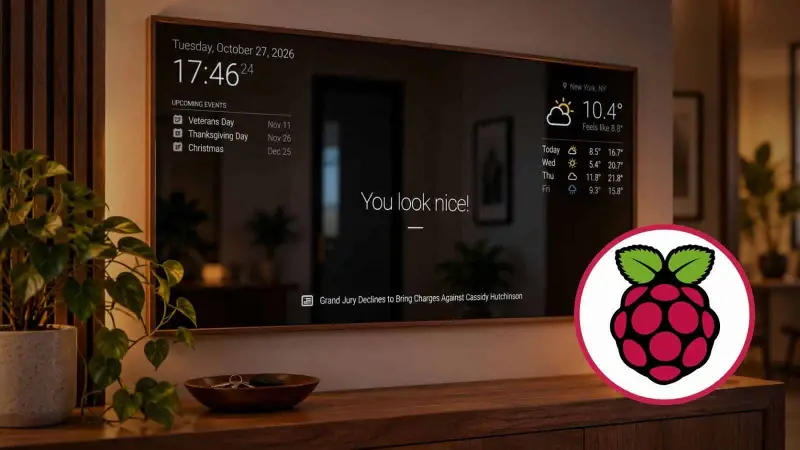
A Raspberry Pi MagicMirror is as much a configurable information display as it is a piece of furniture. Behind two-way glass, a monitor can show a clock, calendar, weather and other data while still reflecting like a conventional mirror. The software also works as a standalone dashboard, so you can explore the display before building a frame.
MagicMirror, created by Michael Teeuw, runs on a Raspberry Pi and uses a system of modules to present information. The setup described here installs the application on Raspberry Pi OS with a desktop environment, then covers the configuration file, remote viewing, automatic startup and community modules. A manual installation takes a little terminal work, but it leaves the application and its dependencies visible on the system for maintenance.
Choose a display before building the frame
A typical physical build places a screen and Raspberry Pi behind two-way glass inside a frame. A spare monitor or TV can work; a slim VESA-compatible monitor may be easier to fit neatly behind the glass. The display does not need a smart operating system, since the Raspberry Pi runs the dashboard.
The frame and glass are a separate mechanical project. If woodworking is not part of the plan, MagicMirror can run on a regular screen as a “Magic Dashboard.” That gives you the software experience without cutting a frame or mounting glass. In either arrangement, the screen’s size and placement will shape which modules and positions make sense.
Install MagicMirror on Raspberry Pi OS
There are several ways to set up the software. A ready-made Magic Mirror OS image can be flashed to a microSD card for a quick trial. Docker is another option, and installation scripts can automate setup. Those approaches may be convenient for an initial test, but the guide’s recommended route is to install Node.js, download the MagicMirror repository and install its dependencies with npm. That makes the application files and configuration easier to inspect directly.
The steps below assume Raspberry Pi OS with a desktop environment. The setup may work on other distributions, but that is not the environment covered here. Check the current MagicMirror release requirements before installing: the required Node.js version can change over time.
Install the application
Install Raspberry Pi OS with a desktop environment. Use a dependable microSD card for the operating system, particularly if the display will be left running for long periods.
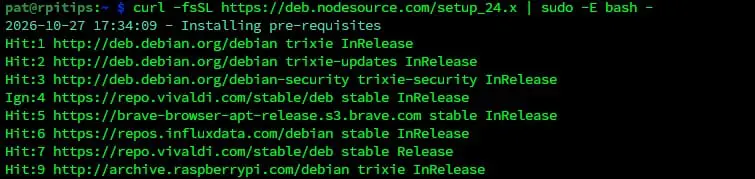
Install Node.js. The commands shown in the guide use the NodeSource setup script for the 24.x series, followed by apt:
curl -fsSL https://deb.nodesource.com/setup_24.x | sudo -E bash -
sudo apt install nodejs
Confirm that this version meets the requirements for the MagicMirror release you intend to install.
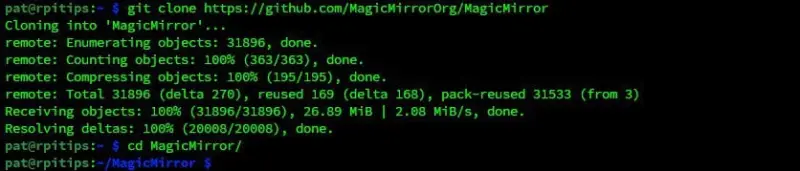
Clone the MagicMirror repository and move into its directory:
git clone https://github.com/MagicMirrorOrg/MagicMirror
cd MagicMirror
Install the application dependencies:
npm installCreate a working configuration file from the supplied sample:
cp config/config.js.sample config/config.jsStart MagicMirror:
npm run start
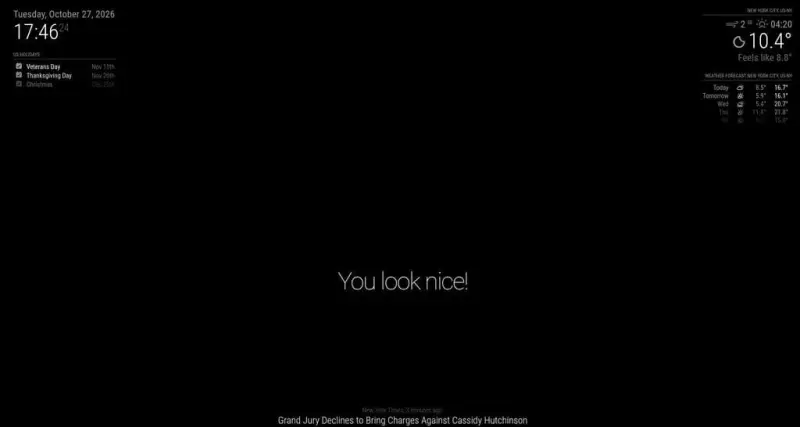
The default screen includes a date, weather, news and a rotating compliment. At this point, the essential software is running; the next step is to adjust what it displays and where.
Understand and edit the configuration
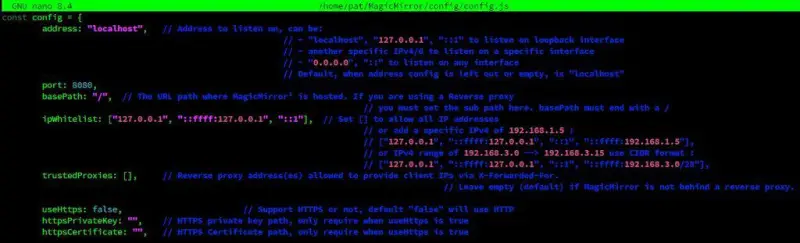
MagicMirror reads its settings from config/config.js in the application directory. For a typical user account, the full path is /home/$USER/MagicMirror/config/config.js. Open the file in an editor such as nano. The first part contains general settings, including the network address, port, language, locale and time format. These values can affect the display as a whole. For example, set the time format to 12-hour time if that suits the installation, or change the language setting to a preferred locale.
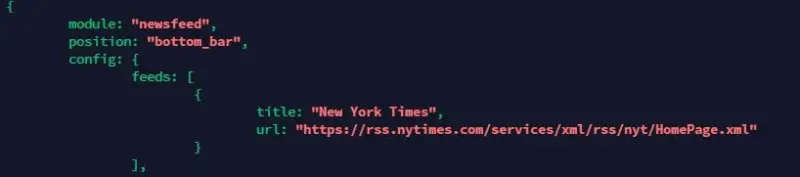
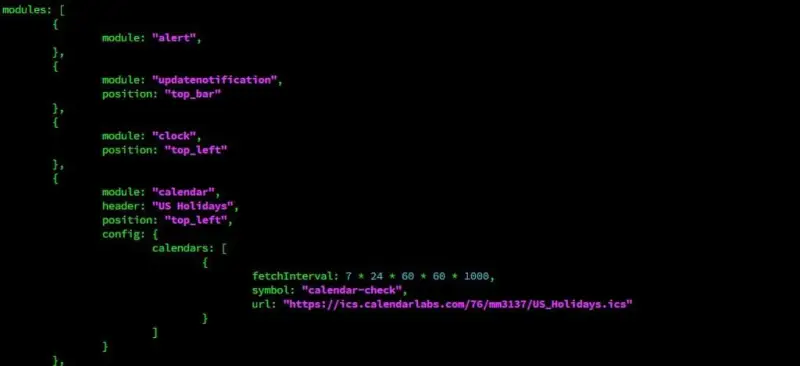
The remainder of the file defines the display’s modules. Each module has its own name and usually a position. Some modules have additional settings: a calendar, for example, can use a URL to retrieve calendar data. The sample configuration is a useful starting point because it shows the structure and options for the modules included with the application.
Change the news feed
The default news feed displays headlines and publication dates from the New York Times. To use another feed, edit the newsfeed module in the configuration file. Open it with:
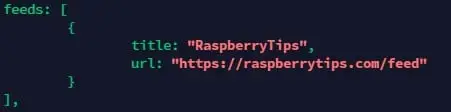
nano /home/$USER/MagicMirror/config/config.jsFind the newsfeed entry, then change its title and feed URL to the values you want to display. Save the file and restart the application so it reads the updated configuration. If you started MagicMirror directly in a terminal, return to its directory and run:
cd /home/$USER/MagicMirror
npm run start
Modules can also be removed or moved by editing their entries. Keep a backup of config.js before making larger changes. If a setting or comma is misplaced, restoring a known-good copy is often quicker than reconstructing the previous configuration.

Exit the full-screen display
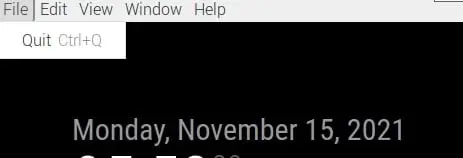
MagicMirror opens full screen by default, and its window may not show an obvious exit control. Press Alt to reveal the desktop menu, then choose File and Quit; Ctrl+Q is another way to close the application. If those shortcuts do not work, use the Win key—or the Raspberry Pi key on a Pi 400—to open the desktop controls and close the window.
View and debug the display from another computer
Editing the configuration over SSH can be more comfortable than working at the mirror itself. MagicMirror can also be viewed in a browser on another computer, which is handy when one screen shows the live display and another is used for editing. The configuration controls whether the application accepts network connections and which addresses are allowed to reach it.
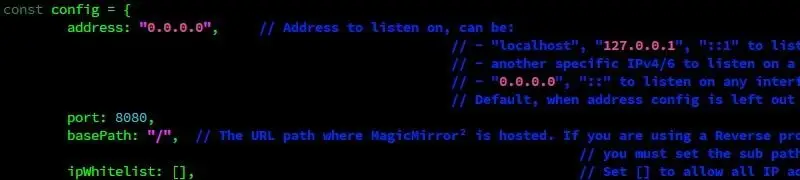
In config.js, set the address to the Raspberry Pi’s current network address, or use 0.0.0.0 to listen across its network interfaces:
address: "0.0.0.0"The default port is 8080. Change it only if another service on the Raspberry Pi already uses that port. The ipWhitelist setting controls which client addresses can connect. If the computer that will view the display has a fixed address, add that address to the list. For example:
ipWhitelist: ["192.168.1.10", "127.0.0.1", "::ffff:127.0.0.1", "::1"]To allow connections from any address, the configuration example uses an empty list:
ipWhitelist: []After changing these settings, restart MagicMirror and open http://<IP>:8080 in the other computer’s browser, replacing <IP> with the Raspberry Pi’s network address. HTTPS can be configured with a certificate, but it is not required for viewing changes on a local network. A browser also provides developer tools that can help identify JavaScript errors when a module fails to load or display as expected.
Correct the weather location and units
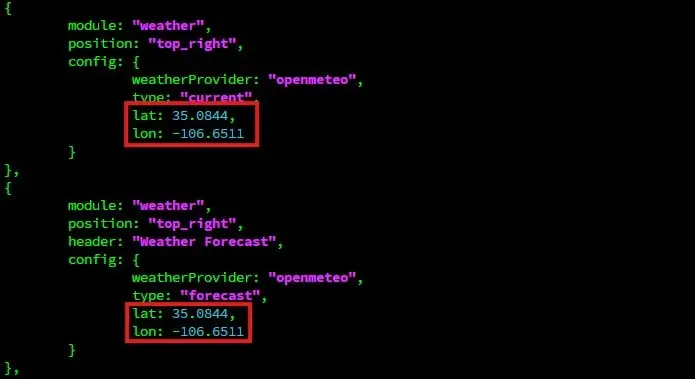
The default weather modules may remain on “Loading…” or show conditions for the wrong place until their location settings are corrected. The configuration includes separate entries for current conditions and the forecast, so update both.
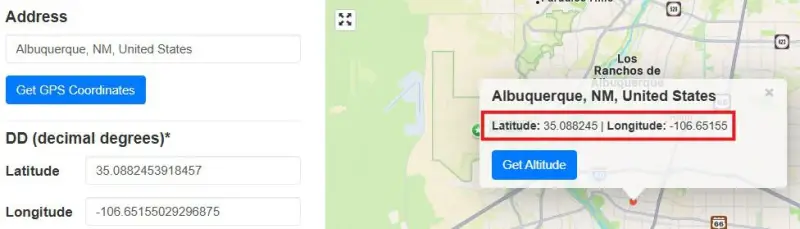
Find the latitude and longitude for the location you want the display to use.

Open
/home/$USER/MagicMirror/config/config.jsand locate the two weather module entries.Replace the latitude and longitude in both entries with the chosen location’s coordinates.

Check the units setting. The sample uses
metric, which reports temperatures in Celsius. Change it toimperialfor Fahrenheit.Restart MagicMirror to apply the edits.

Updating only one weather entry can leave the current conditions and forecast inconsistent. Check both modules before restarting.
Arrange modules on the screen
Each module’s position value determines where it appears. The available regions divide the screen into bars, columns and central areas:
top_barandbottom_barspan the screen’s upper and lower edges.top_left,top_centerandtop_rightsit below the top bar in three columns.bottom_left,bottom_centerandbottom_rightsit above the bottom bar.upper_third,middle_centerandlower_thirdoccupy areas through the middle of the display.
Move a module by changing its position value in the configuration. The arrangement is easier to judge on the target display, where the available screen area and the frame opening determine how much room each region gets.
Start MagicMirror automatically with PM2
A framed display is more useful if it returns to the dashboard after a power cycle. PM2 is a process manager for Node.js applications that can launch MagicMirror at startup and manage it while it runs.
Install PM2 globally:
sudo npm install -g pm2Ask PM2 to configure startup handling:

pm2 startupPM2 prints a command for the system. Run the command it provides; its exact details depend on the account and installation. The example installation produced:
sudo env PATH=$PATH:/usr/bin /usr/lib/node_modules/pm2/bin/pm2 startup systemd -u pat --hp /home/patCreate a launch script in the home directory:
nano /home/$USER/mm.shAdd these lines:
cd $HOME/MagicMirror
npm run start
Save and close the editor, then make the script executable:

chmod +x mm.shStart the script through PM2 and save the running process list:
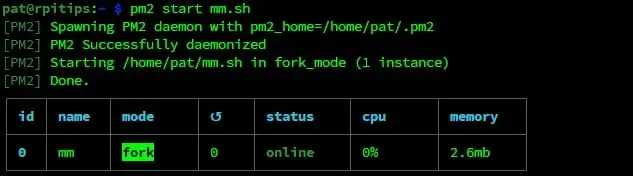
pm2 start mm.sh
pm2 save
PM2 can then manage the display. Restart it after a configuration change with pm2 restart mm. Stop it with pm2 stop mm, and start it again with pm2 start mm.sh. To inspect recent output when the screen goes blank or a change causes an error, use:

pm2 logs mmAdd community modules
MagicMirror’s module system lets you extend the display with software from other developers. Community modules cover things such as jokes, student timetables, financial data and services that expose an API. Modules may connect to calendar, transport or weather services, depending on what their developers support. If the feature you want is missing, the project can also be extended by writing a JavaScript module.
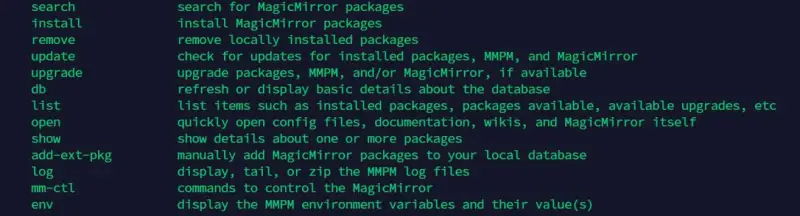
Modules can be installed one by one by cloning their repositories and following each project’s instructions. That means checking the documentation and handling each module’s setup separately. The mmpm manager provides command-line search, listing and installation functions to simplify that process.
Install and set up mmpm
First install its system prerequisites:
sudo apt install libffi-dev nginx-fullThen install the Python package:
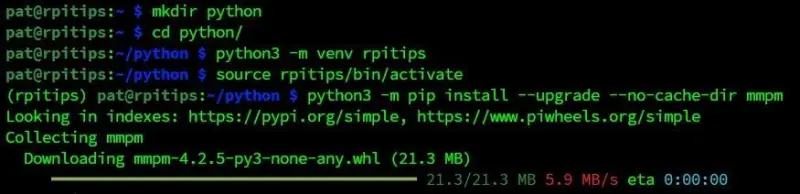
python3 -m pip install --upgrade --no-cache-dir mmpmOn Raspberry Pi OS Bookworm and Trixie, the installation needs to run inside a Python virtual environment. Once the package is installed, start the guided setup:
mmpm guided-setupThe setup asks about the MagicMirror installation and how you plan to use the manager. Answer the prompts, then run the commands it prints. To make the mmpm command available in the shell, add its local executable directory to the path:
echo 'export PATH="$PATH:$HOME/.local/bin"' >> ~/.bashrc && source ~/.bashrcUse mmpm search <string> to find modules, such as:
mmpm search calendarList available packages with mmpm list. The options shown in the guide include -a for all packages and -i for installed modules; mmpm list --help displays the available options. Install a module by name with mmpm install <name>, and use mmpm -h for command help.
Example: add a quote module
To add a rotating quote, search for quote modules and install the selected package:
mmpm search quotes
mmpm install random_quotes
Then add an entry for it inside the modules array in config.js:
{
     module: "random_quotes",
     position: "bottom_bar"
},
Restart MagicMirror through PM2 to load the new module:
pm2 restart mmThe module can have additional settings. For example, its documentation may explain how to select categories such as success or inspirational quotes. Read the module’s own instructions before adding options, since configuration details vary between projects. Modules that depend on external APIs may also need credentials or other setup described by their maintainers.
A practical starting point
The core setup gives you a working display with a configurable clock, calendar, weather and news feed. From there, the configuration file controls the layout and general settings, while PM2 handles startup and process management. Community modules add features as needed. A screen-only dashboard is a good way to check the software and module arrangement before committing to a framed build; once the display behaves as intended, the physical installation can follow.
 AMD Venice Uses 2.5D Packaging to Feed More Bandwidth Into EPYC Zen 6
 CNC Controller Board Design: Interfaces, PCB Specs and Assembly Testing
 Stratasys and Nano Dimension End $42.5 Million Markforged Sale Agreement